Ubuntu Security 101: Essential Practices for a Secure System

Introduction
Building a multi-layered defense is a critical concern for any system, whether it is running in a data center, cloud environment, or on personal hardware. If you are lazy at least follow the minimum minimorum.
Security is an illusion, how good is the illusion depends on you.
This article is about Ubuntu but the principles apply to all distributions. There is a lot of ground to cover so this article will probably be first part of a series.
Basic Security Concepts
Principle of Least Privilege
Users, processes, and applications should only have access to the resources they absolutely need to perform their functions. It reduces the attack surface of your system. If a user account or application is compromised, the damage is limited to only what that entity had access.
In practice, this means:
- Deploy applications using dedicated service accounts with minimal required permissions
- Provide external user access only through SSH with properly configured chroot environments
- Implement restricted shells when users need limited system access
- Use containerization technologies to isolate application environments and dependencies
Note: While containerization offers security benefits through isolation, it adds complexity that can introduce new vulnerabilities if not properly implemented and maintained. The security value depends on proper configuration and management. As a rule of thumb, the more your architecture is complex, the less it is secure. Obfuscation by complexity is not security.
That said, if your system has been compromised, your security layers will only give you some relative time to mitigate the breach. A constant monitoring is necessary but this will be part of a follow up article.
Updates Management
One of the simplest yet most effective security measures is keeping your Ubuntu system updated. Security vulnerabilities are constantly being discovered and patched, making regular updates is essential.
The most obvious way is to do it manually (reboot may be necessary):
sudo apt update && sudo apt upgrade
Cleanup the unused packages
sudo apt autoremove
You can automate the security updates using the unattended-upgrades package, which can be configured to automatically install security updates.
sudo apt install unattended-upgrades
sudo dpkg-reconfigure unattended-upgrades
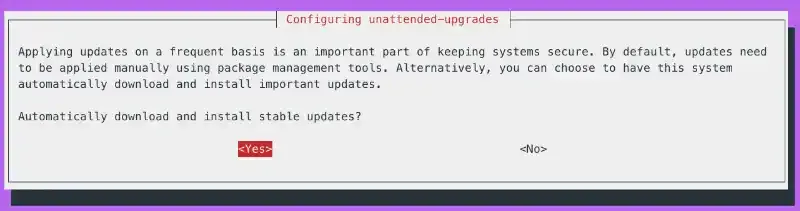
For critical systems, you may want to keep it manual. Establish a testing environment to verify updates before applying them to production systems, ensuring that security fixes don't introduce stability issues.
You can also subscribe to a vendor support such as Expanded Security Maintenance (ESM) from Canonical.
Creating an Administrative User
Ubuntu's permission model is based on users, groups, and the principle of least privilege. For better security, it's recommended to create a dedicated administrative user with sudo privileges. The sudo mechanism allows regular users to execute specific commands with elevated privileges without needing to log in as the root user. This follows the principle of least privilege.
To create a new administrative user (Sherlock Holmes came in mind but feel free...):
# Create a new user
sudo adduser holmes
Follow the instructions and give it a random long password for now, for example: .qPhEFGQ4v2.L6uaHeH7h2a!xBtR
# Add the user to the sudo group so you can elevate its privileges when needed
sudo usermod -aG sudo holmes
From here we could go crazy by implementing sudo rules for fine-grained permissions control, setting timeout values, logging, etc. but let's keep our sanity for the moment.
Creating a SSH Key
ED25519 keys are currently the recommended standard for SSH authentication due to its excellent balance of security and performance. In our case this is what we need here.
To generate an ED25519 key, go to your favorite local terminal on Linux/Mac/PowerShell:
# short version
ssh-keygen -t ed25519 -a 100
# long version
ssh-keygen -t ed25519 -a 100 -N 'Your passphrase' -f ~/.ssh/my_custom_key -C "user@hostname"
Parameters:
-a 100 parameter increases the key derivation function (KDF) rounds, enhancing security against brute force attacks by making the private key harder to crack if it's ever compromised. The default is 16 rounds, so increasing to 100 significantly improves resistance to offline cracking attempts.
-N 'Your passphrase' : use whatever comes to your mind, don't use known quotes or simple passwords. A passphrase is not a password.
-C 'user@location' : use something you can remember and that indicates the device you store your private key for example: maxime@macbookpro
Sources:
| Link | Description |
|---|---|
| NIST Guidelines | Recommends strong key derivation functions |
| Mozilla Security Guidelines | Recommends ED25519 with increased KDF rounds |
| Secure shell | Recommendations still valid today |
| Read the manual | Always good to go to the source |
Adding the public Key
Before disabling password login and disabling root login, you want to add its key to the server. From your local computer where you created the key, you want to display the content of the public key you just created.
# if your key pair name is id_ed25519
cat ~/.ssh/id_ed25519.pub
You should have something like "ssh-ed25519 AAAAC3NzaC1lZDI1NTE5AAAAIFy+0NNSyO3q90Z2ZMUDtg6uX1sK4awI/FBnrtPGIyiE holmes@example.com".
Paste it in your server where you created the user holmes:
# Make sure the .ssh directory exists with proper permissions
mkdir -p /home/holmes/.ssh
chmod 700 /home/holmes/.ssh

# use nano if you prefer
vi /home/holmes/.ssh/authorized_keys

# Set proper permissions for the authorized_keys file
chmod 600 /home/holmes/.ssh/authorized_keys
chown -R holmes:holmes /home/holmes/.ssh
SSH Key-Only Authentication
SSH key authentication provides several advantages over password authentication:
- Immune to brute force attacks
- No passwords to remember or potentially exposed
- Coupled with a passphrase for better security
- Automation-friendly
To enforce SSH key-only authentication:
Option 1: Editing the main configuration file:
sudo vi /etc/ssh/sshd_config

# Add these lines to the file
PasswordAuthentication no
ChallengeResponseAuthentication no
UsePAM no
Option 2 (Recommended): Using the configuration directory '.d':
Include /etc/ssh/sshd_config.d/*.conf
We can just add the new configurations or the overrides here: create a custom configuration file with a high numerical prefix. Add the parameters above and save the file:
sudo vi /etc/ssh/sshd_config.d/99-custom-security.conf
After making changes with either approach, restart the SSH service (or start a new session):
sudo systemctl restart ssh
Using this directory is preferred since we add or override only what we need. It is easier to manage than scrolling thew long default configuration. It makes also a smaller size to save on a version control system.
Disabling Root login
Disabling root login eliminates the possibility of attackers gaining complete system control by compromising a widely-known username, forcing them to identify valid user accounts before attempting privilege escalation.
# Create a new config file (choose any descriptive name)
sudo vi /etc/ssh/sshd_config.d/disable-root.conf

# Add this line to the file
PermitRootLogin no

# Save and exit and restart the service
# Test if it works
Sources:
- Ubuntu Documentation - The official documentation
- DigitalOcean SSH Hardening Guide - Covers best practices for SSH configuration
Keys Comparison
Current SSH Key Options
| Key Type | Size | Performance | Compatibility | Recommendation |
|---|---|---|---|---|
| RSA | Larger (2048-4096 bits) | Slower | Excellent | Good for legacy systems. * Require minimum 3072+ bits to match ED25519 security. |
| ECDSA | Compact (256-521 bits) | Fast | Good | Avoid if concerned about NIST curves |
| ED25519 | Very compact (256 bits) | Very Fast | Modern SSH only | Best choice for new systems |
Future Quantum-Resistant Options
The upcoming OpenSSL 3.5 release (scheduled for April 8, 2025) represents a major advancement in cybersecurity with the integration of post-quantum cryptography (PQC) methods:
-
Post-quantum cryptography (PQC): With the integration of PQC methods in OpenSSL 3.5, these algorithms will soon be available in modern systems:
-
ML-KEM (FIPS 203) — Module Lattice-Based Key Encapsulation Mechanism. This is a PQC standard for key exchange, designed to replace current key exchange methods like ECDH.
-
ML-DSA (FIPS 204) — Module Lattice-Based Digital Signature Algorithm. This PQC standard for digital signatures uses the Dilithium signature method and serves as a replacement for RSA and ECDSA.
-
SLH-DSA (FIPS 205) — Stateless Hash-Based Digital Signature Algorithm. This PQC standard for digital signatures uses the SPHINCS+ signature method.
The integration of these methods into OpenSSL, the most widely used cryptographic library, will move the entire industry forward in quantum-resistant security. Once implemented, Ubuntu systems can leverage these algorithms for SSH authentication, providing protection against future quantum computing threats.
- Hybrid approaches: Some systems now support combining traditional algorithms with post-quantum ones for future-proof security, offering a transition path that maintains compatibility while adding quantum resistance.
Source: - OpenSSL Finally Enters a Quantum World - Detailed analysis of the OpenSSL 3.5 release and its post-quantum cryptography implementation
Protect your private keys
Protect your private SSH keys from being stolen:
- Use strong passphrases on your keys
- Store keys only on trusted devices
- Set proper file permissions (chmod 600)
- Consider using a hardware security key
- Never share or transmit your private keys
- Keep your system updated against vulnerabilities
- Be cautious of malware and keyloggers
- Periodically rotate keys
The most important practices are using strong passphrases and maintaining proper file permissions.
Hardware Security Keys
The authentication requires something you have (the key) and something you do (touch it)
FIDO2, WebAuthn, and FIDO U2F standards were created and developed by the FIDO (Fast Identity Online) Alliance. Hardware security keys like YubiKeys can be used with OpenSSH through FIDO2/U2F support. They prevent private key from being extracted even if your local computer is compromised. Here are some references:
- YubiKeys - Proprietary with Open source contributions
- SoloKeys - Fully open source hardware and firmware
- Nitrokey - Open source security hardware with models designed for SSH
- OnlyKey - Open source hardware with SSH support
You need to have FIDO2 libraries installed, you can check here for more information:
# on mac
brew install libfido2
Most FIDO2 security keys have a touch-sensitive area or button that you need to physically press when authenticating. This physical touch requirement is a security feature called "user presence verification" that ensures:
- A human is actually present during the authentication
- Malware can't silently use the key without your knowledge
The key generation will look like
ssh-keygen -t ed25519-sk -O resident -f ~/.ssh/id_ed25519_sk

# you still want to add a passphrase...
One last thing, don't travel with your key or put it in the same bag than your laptop.
Monitor failed logins
Since we're eliminating password authentication entirely in favor of SSH keys, traditional account lockout policies based on PAM become unnecessary for SSH access. However, it's still important to protect against unauthorized access attempts:
Set up automated log monitoring to detect and alert on repeated failed authentication attempts:
# Install fail2ban
sudo apt install fail2ban

# Create a custom jail configuration for SSH
sudo vi /etc/fail2ban/jail.d/ssh-custom.conf

#Add the following configuration (time in seconds):
[sshd]
enabled = true
mode = aggressive
bantime = 86400
findtime = 600
maxretry = 3
Useful commands:
# restart fail2ban after making configuration changes
sudo systemctl restart fail2ban
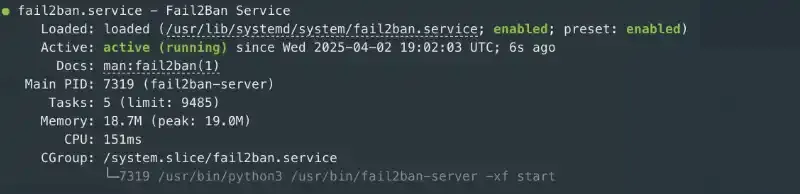
You can verify fail2ban is running with:
sudo systemctl status fail2ban
Check if your jail is active with:
sudo fail2ban-client status sshd
# output example
Status for the jail: sshd
|- Filter
|  |- Currently failed: 0
|  |- Total failed:  0
|  `- Journal matches:  _SYSTEMD_UNIT=sshd.service + _COMM=sshd
`- Actions
   |- Currently banned: 0
   |- Total banned:  0
   `- Banned IP list:
This configuration will ban IP addresses after 3 failed attempts within 10 minutes for 24 hours, even though we're not using password authentication. It helps reduce log noise and server load from persistent attackers.
If you need to unban a specific IP address:
# sudo fail2ban-client set JAIL unbanip IP_ADDRESS
sudo fail2ban-client set sshd unbanip <ip address>
Firewall
Security with Firewalls is a vast topic. Here is what you can do at your level when dealing at the instance level. Consider limiting SSH access to specific IP addresses or ranges:
# check if Uncomplkicated Firewall (ufw) is enabled
sudo ufw status

# if inactive
sudo ufw enable

# Allow SSH only from specific IP address
sudo ufw allow from <your ip address or network> to any port 22
Docker in the room
Docker and ufw have issues working together. Docker directly manipulates iptables rules, which can bypass UFW's filtering rules. There are workarounds but it is not ideal. That would make a whole article on its own so i will leave this note here.
Conclusion
By implementing the fundamental security measures described in this article, from applying the principle of least privilege to configuring SSH key-only authentication with ED25519 keys, you place your system in a stronger position than many others. Regular updates, proper user management with administrative accounts, and proactive monitoring through fail2ban form a solid foundation that protects against common attack vectors.
Remember that security is like an onion with multiple layers. The measures we've covered represent some of the essential inner layers, but a comprehensive security strategy extends much further. As mentioned at the beginning, this article is likely the first in a series, future advanced topics may include:
- Network security and infrastructure protection (NGFW/VPN)
- System monitoring (SIEM/IDS)
- Enhanced Identity and Access Management (IAM/MFA/RBAC)
- Application and API security (OWASP/WAF/CSP/OAUTH)
- Deployment security (CI-CD/SAST/DAST)
Security is not a one-time setup but an ongoing process. Regularly review your logs, test your security measures, and stay informed about new vulnerabilities and their mitigations.
If you're looking to implement these security measures or need assistance with more advanced protections for your specific environment, feel free to reach out. Sometimes having an experienced guide can save you hours of troubleshooting and ensure your security layers are properly configured from the start.